Earthworms and Organic Gardening
Composting With Worms
Earthworms and organic gardening go hand in hand. These little worms are your secret weapon to a healthy, happy garden. They loosen the soil so your plants can extend their roots more easily and they also fertilize soil as they eat their way through dead matter. What relationship could be more perfect?
But did you know that these darling little worms can also turn kitchen waste into rich soil for the best garden ever? And while you could buy one of those expensive worm composters for about $200, you can easily make one for less then $20. Here's how.
Vermi What?
Vermicomposting is also called vermiculture and means using worms – red wigglers usually – in addition to microbes and bacteria to turn your organic waste into a nutrient rich fertilizer.
Keep your worms in a worm composter (Read on to learn how to make one) then give your little wrigglers the same organic waste – everything organic except for meat and fruit rinds – that you would normally put in your compost pile.
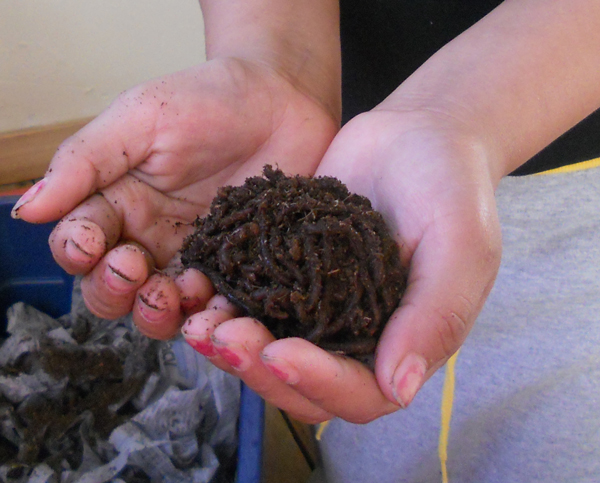
Red wigglers like these are the best for composting kitchen waste into rich soil.
The end product (okay, worm poop) is your vermicompost. Start composting with worms, and you'll soon have an excellent fertilizer that is far richer than ordinary compost.
That's because in addition to clearing away your kitchen scraps and giving off nutrients in the process, worms also give off a mucus that will actually prevent these wonderful nutrients from washing away with the next watering.
These nutrients will stick to your soil right where your plants can reach them. What could be better than the dynamic duo of earthworms and organic gardening?
How to Make a Composter
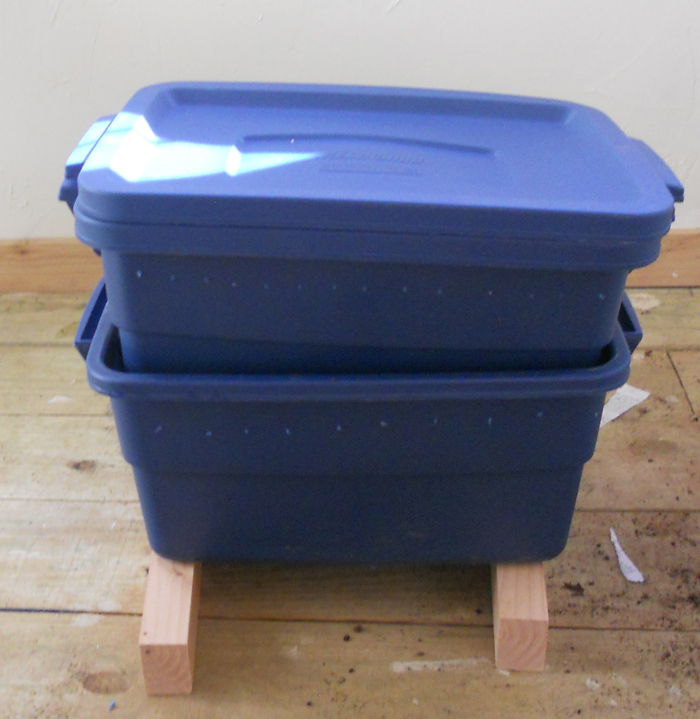
My finished composter is on the left. You will need at least two three-gallon, plastic containers with lids.
You can find them at Ace Hardware or at your local Wal Mart or Target.
Notice the tiny holes that run along the top of the sides? They're big enough to let oxygen in, but too small for the worms to escape.
Prepare the Containers
With regular composting, you just toss everything into a pile. However, with the powerful earthworms and organic gardening duo, you will need a special container that provides both drainage and air flow.
To provide this, you'll need to drills holes in your containers to allow for oxygen and travel.
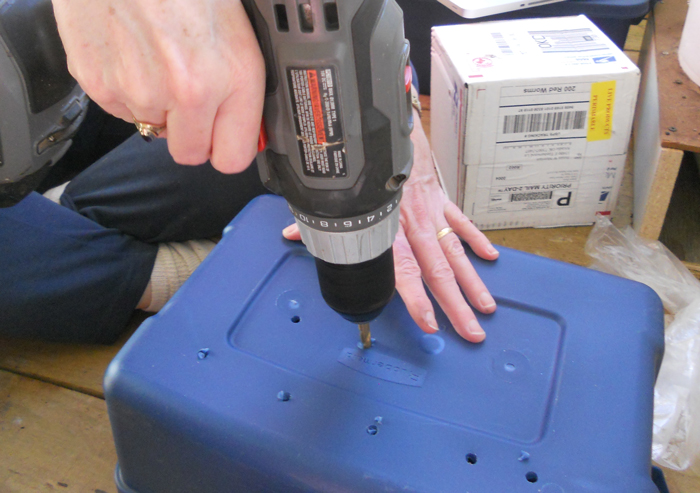
Drill half-inch sized holes in the bottom of the bins. This will allow the worms to travel from one level to another.
You will also need to drill one-eighth inch-sized holes along the top of the sides to allow for oxygen.
Place Bedding in Your Container
Make your initial bedding for your worms by getting newspaper damp and then shredding it.
Place the damp shreds in your bin and then add your earthworms.
Sometimes I will just dig up soil from around our property to use as bedding. It works well. Earthworms like to eat a little soil along with the kitchen scraps.
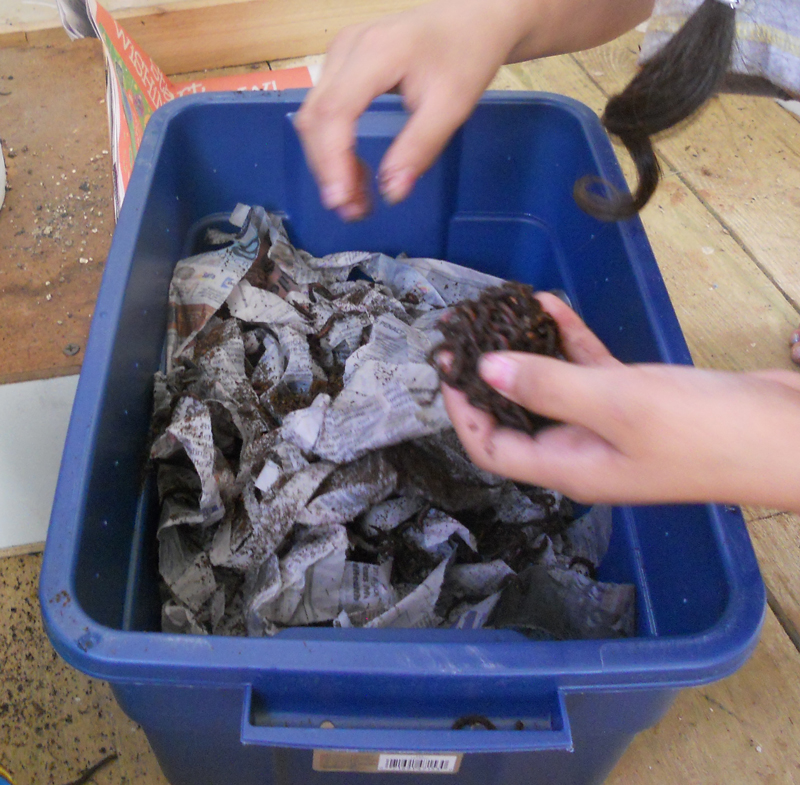
Set aside the lid from the bottom container (the one that contains your bedding and worms). Then gently place the top container in the bottom one. Fill this top container with damp newspaper, soil and kitchen scraps and then cover it with a lid.
You will continue adding kitchen scraps to this top container.
Earthworms and Organic Gardening
How a Worm Composter Works
Worms like to travel up as they eat through organic matter. Once they eat all the organic matter in the first level, they'll work their way to to the next level.
During the first month, keep putting kitchen scraps in the top level. Eventually, all the worms will travel up to the top level. Then you can harvest the new soil from the bottom level that is rich with worm castings.
That way, you don't have to sift through compost to pull out the worms to put back in your bins, which is time consuming. There may still be a few stray worms in the bottom level. Either add them to the top layer of your composter or throw them in your garden.
If you want more worms and more compost, add another container or two to your composter. Just remove the lid from the top container and gently add the new container (with drilled holes in the bottom and sides) on top. Put bedding and kitchen scraps in the new, top container, and you're good to go.
Earthworms and Organic Gardening
Providing the Right Bedding
When composting with worms, you will need bedding that resembles what they would have in nature. Use shredded newspaper, dead leaves, sawdust, hay, cardboard, burlap coffee sacks or peat moss. You can also use garden soil.
Your wrigglers will eat their bedding as well as live in it, so make sure their bedding is moist and loose. It should be about as damp as a wrung out sponge and loose enough so that the worms can breathe and oxygen can get in to allow the matter to decompose.
Be Careful With Paper and Cardboard
The glossy paper from newspapers and magazines may contain toxins. Also, avoid cardboard that contains wax or plastic, such as cereal boxes or other containers that were used to hold food.
How Much Waste Can You Add?
When you first start out combining earthworms and organic gardening through earthworm composting, only feed your little guys about half of their body weight each day.
That means if you have one pound of worms, you should only provide them with half a pound of kitchen scraps. In time, as your worms grow, they'll be able to consume more, and you can then give them closer to equal their body weight. A good rule of thumb is to wait until the old food scraps have been processed before adding new scraps.
Protect Your Worms from the Extremes
Earthworms and organic gardening do well with more consistent temperatures. If you are composting with worms and live in a warm climate, keep your bin out of the direct sun. You want the bin to remain moist. Also, red wigglers are temperature sensitive, so don't let your bin get below freezing or above 84 degrees Fahrenheit.
Have Allergies?
All composters produce molds, which occur naturally with composting and actually help break matter down. So when composting with worms, if you are allergic to mold or mildew, you will need to keep your worm composter outside or in your garage.
If Things Get Stinky
Just like with a regular compost pile, when composting with worms, things may get stinky if you have too many greens in the mix. You want about thirty parts of brown items (carbon) to about one part of the green things, such as grass clippings or lettuce leaves (nitrogen).
Again, don’t use meat scraps as these will attract rodents. Also, do add fruit rinds. Your worms won’t be able to eat through them quickly enough, and they will start to stink.
What If Your Worms Get Company?
After a while, you may notice other bugs in your compost, such as millipedes and pill bugs. Don't worry. These bugs will help with the composting.
When Using This Wonderful Compost
The great thing about earthworms and organic gardening is you end up with a product that is incredibly rich. But it's also so rich that you don't want to use it alone as a seed starter. Instead, add it to your potting mixes for extra nutrients. A good rule of thumb is to use one part worm poop to four parts of potting mix.
Learn More About Organic Gardening
Return from Earthworms and Organic Gardening to the Home Page





New! Comments
Have your say about what you just read! Leave me a comment in the box below.